DIY Install - Pull Out Kitchen Cabinet Shelves
Learn how to get pro results applying epoxy coating to your garage floor!
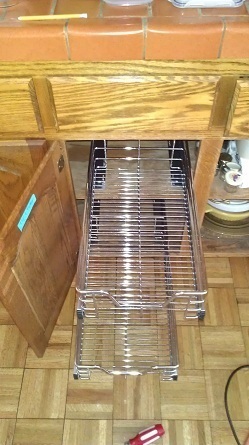
First of all, these things are fantastic for the organization of your kitchen! To install these types of kitchen cabinet slide out or roll out shelves yourself, you will need to use an attachment on your drill for right angles as shown.
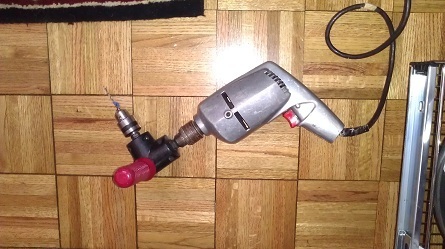
When you're trying to find the right drill bit for the screw, hold the screw and a drill bit that you think is close up together in the light. The bit should be the same size as the shank of the screw without the threads, so the threads dig into the wood and there is enough room in the hole for the inner part of the screw.
You will need a light source; I've found that one of these "flashlights that strap to your head" works well.
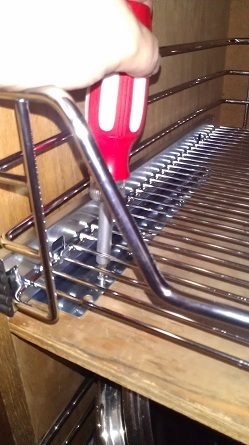
Now put the tray together with the runners and place the entire shelf hardware assembly inside the cabinet. Put it exactly were you want it to go, making sure that the edge of the tray doesn't scrape the side of the cabinet when you pull it out, and also that the cabinet door closes completely, and that the whole tray looks square. When in the right place, carefully mark four of the screw holes on each side by tracing around the holes with a pencil (making circles, and use the big holes in the runners not the little ones, so you can adjust later) while not bumping the hardware out of place.
Take the whole assembly out of the cabinet and drill two of the four holes on each side using your right angle drill attachment, right in the middle of your pencil circles. Now take the runners off the bottom of the tray and put them inside the cabinet, starting the screws only.
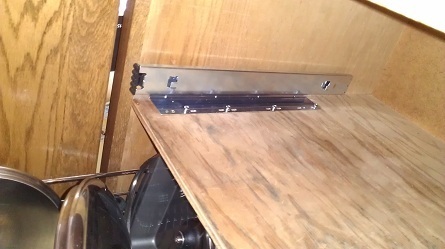
Next put the metal tray basket back on top of the rolling hardware and screw the 4 screws in all the way, making sure that the entire assembly ends up exactly where it should go. There should be enough play in the screws to move it around till its right. In other words, the pull out tray moves in and out straight, the cabinet door closes all the way and it looks good.
Lastly, take the tray off the runners again and then drill the rest of the holes. Screw in the screws and put the tray back on. The reason for this seemingly round about process is that it is far easier to line up four holes then eight (you should put 8 screws in because of the weight of the pots.)
You Are Done!
Show Your Support - Tip Me With Stripe
